How to Install a Fingerprint Door Lock in 5 Steps
Learn how to install a fingerprint door lock in 5 easy steps to boost your home security. Follow our detailed guide for expert insights and tips.
In today’s world, ensuring the security of your home has become more critical than ever. With the advancement of technology, one of the most effective ways to enhance your home security is by installing a fingerprint door lock.
In this comprehensive guide, we will walk you through the process of how to install a fingerprint door lock in 5 simple steps, providing you with peace of mind and convenience.

How to Install a Fingerprint Door Lock in 5 Steps
Home security is a top priority for homeowners, and modern technology has provided us with innovative solutions to bolster our safety.
One such advancement is the fingerprint door lock, a cutting-edge device that offers both convenience and security.
Gone are the days of fumbling for keys or worrying about unauthorized access. In this article, we will guide you through the installation process in five easy steps.
Step 1: Gather Your Tools and Supplies
Before you start, make sure you have all the necessary tools and supplies. Here’s what you’ll need:
1. Fingerprint door lock kit
3. Drill with the appropriate drill bits
4. Measuring tape
5. Pencil
6. Screws and anchors
7. Level
8. User manual (from the lock kit)
Step 2: Remove the Old Lock
If you already have a traditional lock on your door, you’ll need to remove it. Follow these steps:
1. Using your screwdriver, remove the screws securing the old lock to the door.
2. Carefully detach the lock from the door.
3. Ensure the area is clean and free from any debris.
Step 3: Install the Fingerprint Door Lock
Now, let’s proceed with installing your new fingerprint door lock:
1. Position the new lock on the door, aligning it with the existing holes.
2. Mark the positions for new screw holes using your pencil.
3. Use your drill to create holes for the screws and anchors.
4. Secure the lock in place using the provided screws and anchors.
5. Double-check that the lock is level and properly aligned.
Step 4: Connect the Wiring
To ensure your fingerprint door lock functions correctly, connect the wiring as per the user manual instructions.
This usually involves connecting the power source and any necessary cables to the lock.
Step 5: Program Your Fingerprints
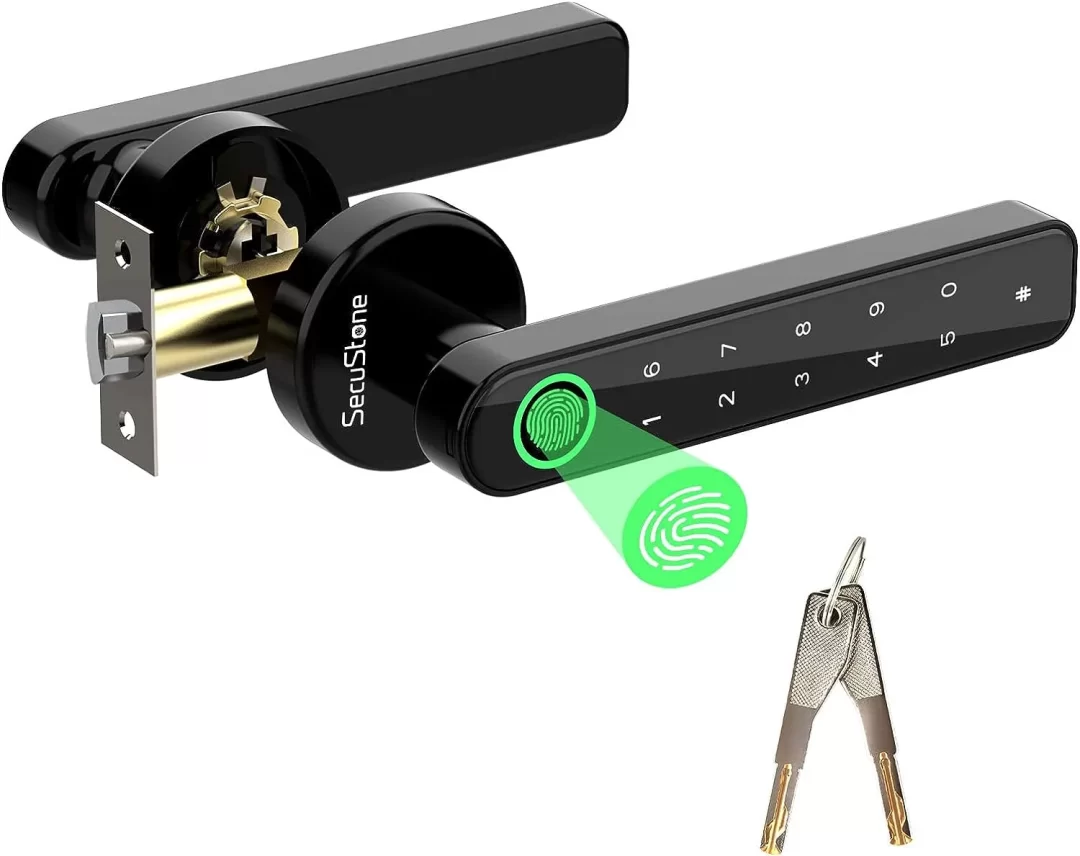
The final step is to program your fingerprints into the lock’s memory:
1. Follow the user manual to access the programming mode.
2. Place your finger on the scanner as instructed.
3. Repeat the process for all authorized users.
4. Test the lock by using your programmed fingerprints to unlock the door.
Congratulations! You’ve successfully installed a fingerprint door lock, enhancing the security of your home while adding a touch of convenience to your life.
Conclusion
Make sure the lock can be locked and unlocked using the fingerprint recognition feature. Test it several times with different authorized users to ensure that it works reliably.
After completing these steps, your fingerprint door lock should be successfully installed and ready to enhance the security and convenience of your space.
Be sure to keep the user manual and any backup access methods (like keys or codes) in a safe place in case you ever need them.
READ ALSO!!!