Wood Fence Gate Kit: What to Look Out For
Wood fence gates are not only functional but also add aesthetic appeal to your property. If you’re considering building a wooden fence gate, using a gate kit can simplify the process and ensure a sturdy and reliable structure.
This article will discuss what to look out for when choosing a wood fence gate kit. Let’s dive in!
Wood Fence Gate Kit: What to Look Out For
Here are 4 basic things to look out for when buying tools for a wood fence:
1. Quality of Materials
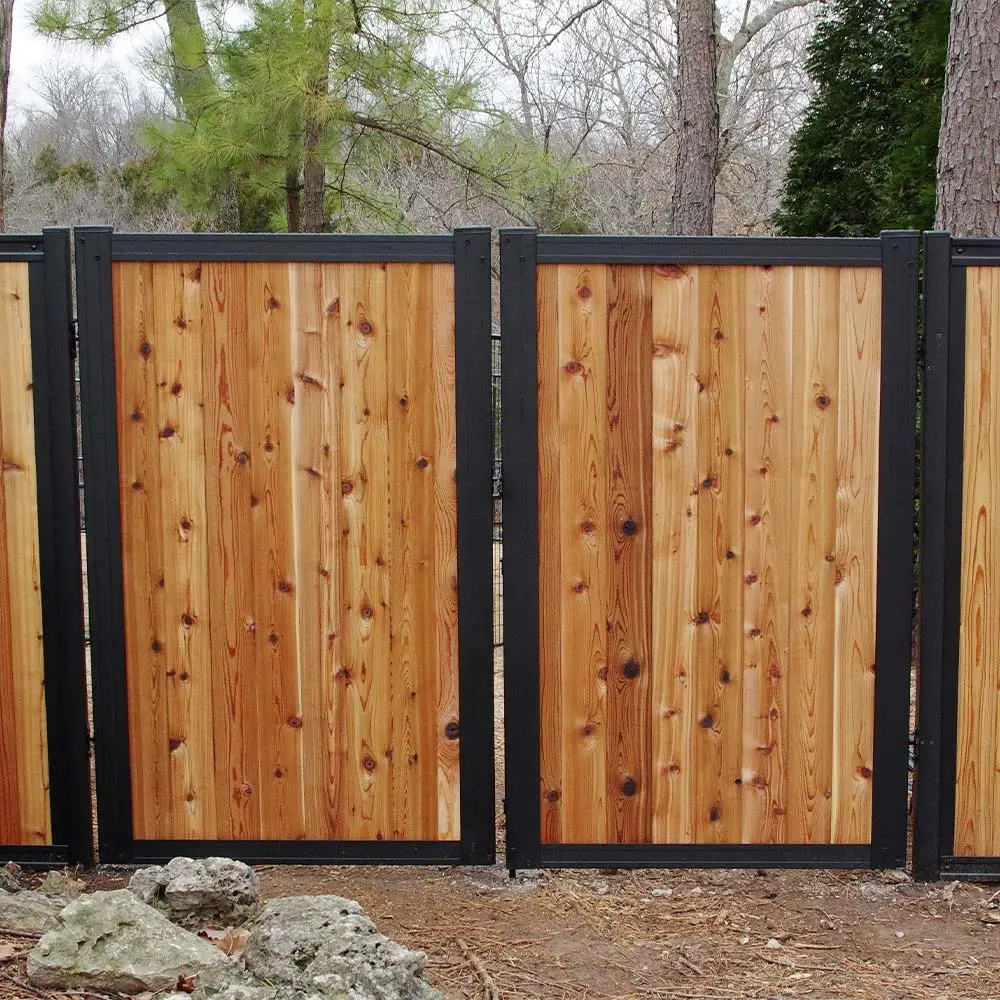
When selecting a wood fence gate kit, ensure that it includes high-quality materials such as durable wood boards, sturdy hinges, a reliable latch, and appropriate screws or nails.
Look for kits that feature weather-resistant wood like cedar or pressure-treated lumber to ensure longevity.
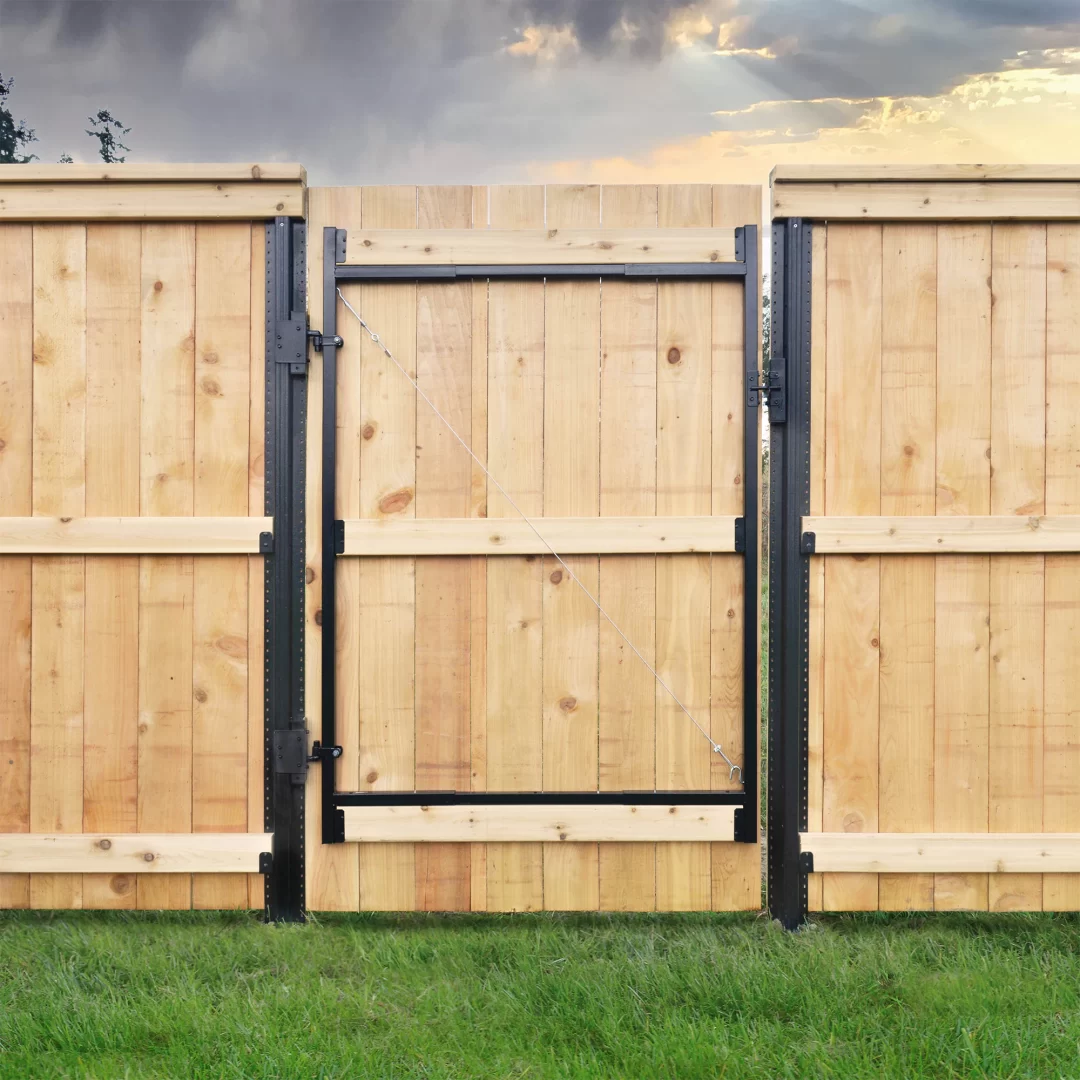
2. Compatibility and Sizing
Consider the dimensions and design of your fence when choosing a gate kit. Ensure that the kit is compatible with the type and height of your existing fence.
Measure the opening where the gate will be installed accurately to select a kit that fits properly.
3. Gate Hardware
Pay attention to the quality and functionality of the gate hardware included in the kit. The hinges should be robust enough to support the weight of the gate, and the latch should be easy to use and secure.
Consider the style of a latch that suits your needs, such as a thumb latch or a gravity latch.
4. Ease of Installation
Look for gate kits with detailed instructions and necessary hardware for installation. Some kits may also include pre-cut and pre-drilled components, making assembly easier.
Wood Fence Gate Kit: Materials and Tools You Need
To build a wood fence gate, you will need the following materials and tools:
Materials:
1. Wood boards: Choose durable and weather-resistant wood, such as cedar or pressure-treated lumber.
2. Gate hardware kit: This typically includes hinges, a latch, and screws or nails.
3. Wood screws or nails: These will be used to secure the gate boards together and attach the hardware.
4. Gate latch: Choose a latch that suits your needs, such as a thumb latch or a gravity latch.
5. Wood glue: Optional, but can provide additional strength when securing the boards together.
6. Wood stain or paint: If desired, you can apply a finish to protect the wood and enhance its appearance.
Tools:
1. Measuring tape: For taking measurements.
2. Saw: A circular saw or a miter saw to cut the wood boards to the desired size.
3. Screwdriver or drill: To drive screws or drill pilot holes for nails.
4. Level: To ensure the gate is installed properly and is level.
5. Carpenter’s square: For making accurate cuts and ensuring the gate is square.
6. Clamps: Helpful for holding the boards together while attaching them.
7. Safety equipment: Safety glasses, gloves, and ear protection are recommended when working with tools.
Please note: The specific requirements and measurements may vary depending on the size and design of the gate you plan to build. It’s advisable to consult detailed instructions or seek professional advice for your specific project.
How to Make a Simple Wooden Fence Gate
1. Measure the Opening: Start by measuring the width and height of the gate opening to determine the size of the gate you need.
2. Gather Materials and Tools: Collect the necessary materials such as wood boards, gate hardware, screws or nails, wood glue (optional), and tools including a saw, screwdriver or drill, level, carpenter’s square, and clamps.
3. Cut the Wood: Use a saw to cut the wood boards to the desired size for the gate frame and individual slats. Ensure that the frame is square and the slats are evenly spaced.
4. Assemble the Gate Frame: Attach the frame boards together using screws or nails. Apply wood glue for additional strength if desired. Use a level to ensure the gate frame is straight and square.
5. Attach the Slats: Secure the slats vertically or horizontally onto the gate frame, leaving equal gaps between them. Use clamps to hold the slats in place while attaching them.
6. Install Gate Hardware: Follow the manufacturer’s instructions to install the hinges and latch included in your gate kit. Ensure that the gate is level and functions smoothly.
7. Finish the Gate: If desired, apply a wood stain or paint to protect the wood and enhance its appearance. Allow sufficient drying time before installing the gate.
What is the Best Wood for a Wood Gate?
The best wood for a wood gate is one that is durable, weather-resistant, and visually appealing. Cedar and pressure-treated lumber are popular choices due to their natural resistance to decay and insects.
These woods also look attractive and can be stained or painted to match your preference.
How Much Does it Cost to Build a Wood Gate?
The cost of building a wood gate can vary depending on factors such as the size, design, quality of materials, and location. On average, the cost can range from $200 to $800 or more.
It’s recommended to obtain quotes from local suppliers and contractors to get a more accurate estimate for your specific project.
What is the Best Joint for a Wooden Fence Gate?
The best joint for a wooden fence gate is the mortise and tenon joint. This joint involves cutting a mortise (a rectangular hole) in one piece of wood and creating a matching tenon (a projection) on the other piece.
The mortise and tenon joint provides excellent strength and stability, making it ideal for gate construction. Additionally, reinforcing the joint with screws or dowels can further enhance its durability.
Conclusion
When considering a wood fence gate kit, it’s crucial to ensure the materials are of high quality, the kit is compatible with your fence, and the hardware is reliable. By following this simple step-by-step guide, you can construct a simple wooden fence gate that suits your needs.
READ ALSO!!!